Forms are used for data collection and viewing information about a feature, like a Restaurant or Onsite System. Forms can also be printed or saved and uploaded as a PDF.
To print a Form select a mapped feature, such as the Onsite System or Restaurant, and select ‘Show Form’ to open the corresponding Form. In this example the System point is selected and the System Information Form is opened.
Next, use one of two Print options as described below:
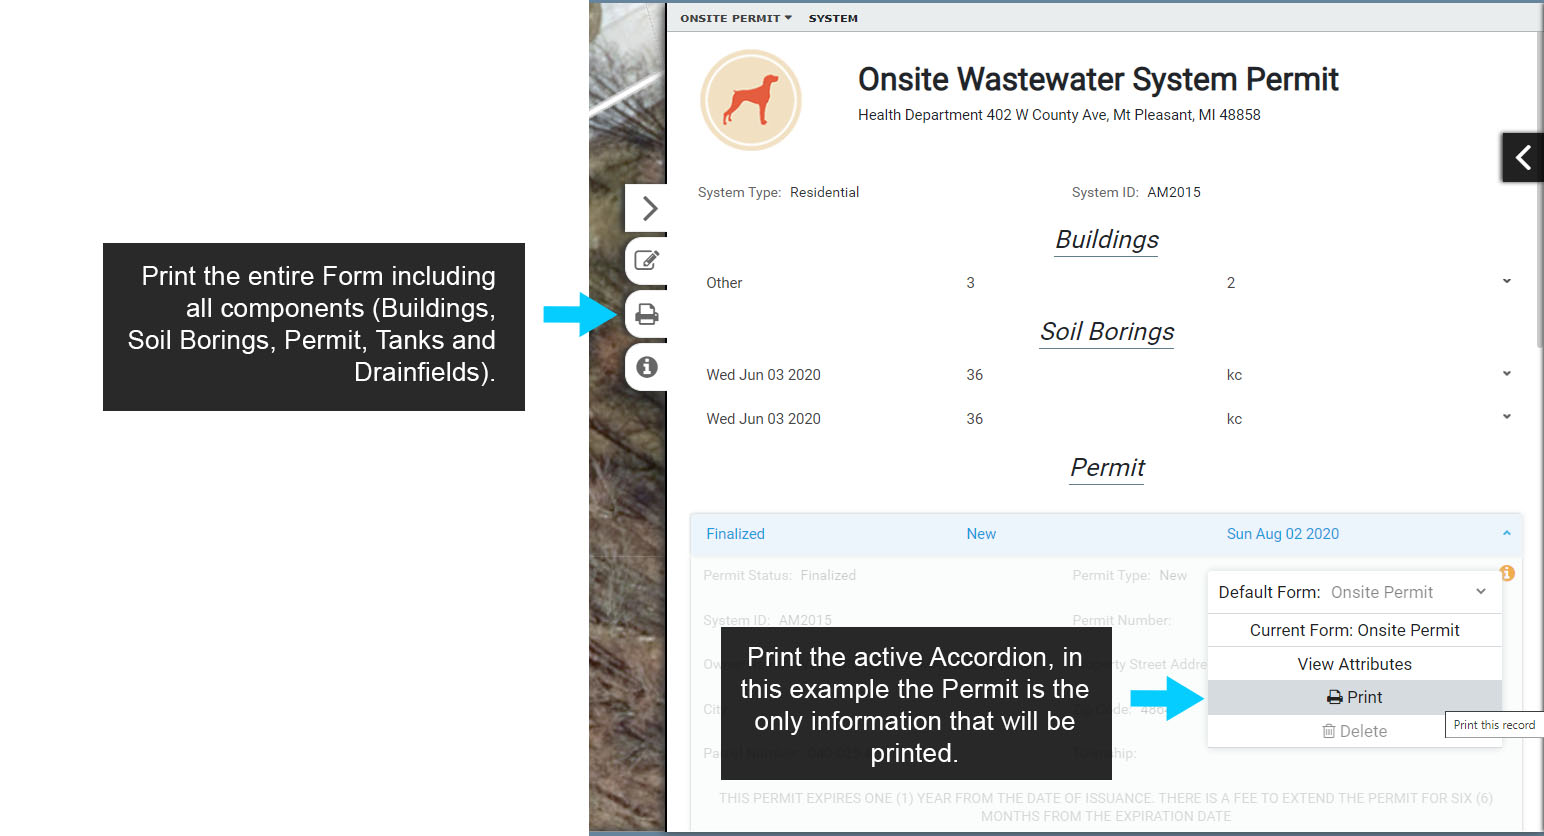
Print Entire Form: to print the entire Form, including any Linked Forms (Inspections, Violations, Buildings, Soil Borings, Applications, Permits, Septic Tanks, etc.), use the Print button located on the side of the Form.
Print a Single Accordion: to print only a Linked Form select the Information Icon at the top right of any Accordion, then select Print. This option will only Print the parent Form information, in this example the System Type and System ID, and the Accordion, in this example the Permit Accordion.
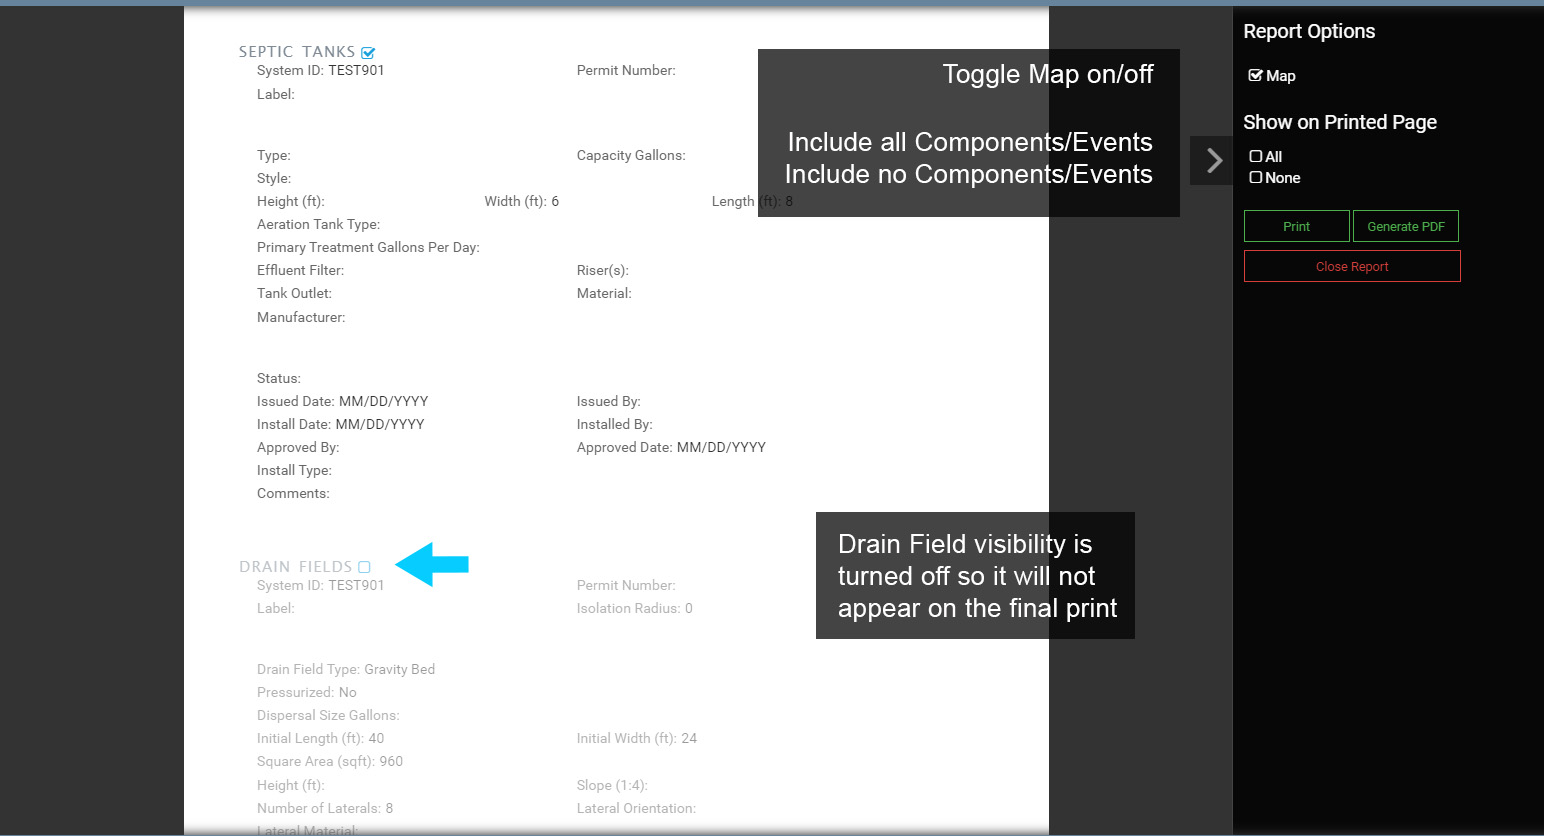
Once in the Print menu you still have the option to remove Accordions that you do not want to print. Each Accordion on the Form has a visibility control when in Print mode that can be toggled on/off.
When the visibility of an Accordion is toggled off, the corresponding Accordion will be grayed out, indicating it will not show up in the final output.
Toggle the visibility on/off to see how it behaves. Also toggle the Map on/off and test the All and None controls to become familiar with how they work.
To create output, select Print or Generate PDF. Note that selecting Generate PDF will also provide the option to Upload and/or Email the PDF. Uploading the PDF will upload the PDF to the corresponding Form.