
The Text Library is used to add standard text to Permits, Drainfields, Septic Tanks and Land/Site Evaluations. Standard text that is in the Text Library can then be used to add Instructions, Site Preparation, Isolations and Remarks when creating a Permit, Drainfield, Septic Tank or Land/Site Evaluation.
Text that is added to the Permit, Drainfield, Septic Tank or Land/Site Evaluation persists as data, so it will always be retained in the database similar to other data. Text can also be edited when it is added to a Form, so creating placeholders (size, depth, type, etc.) for features are easy to integrate.
Additional Content: Update Video Text Library
Managing the Text Library #
Adding, removing or modifying Text Items that have been added to the Text Library starts by selecting a Table (Permit, Land Evaluation, Drainfield, Septic Tank).
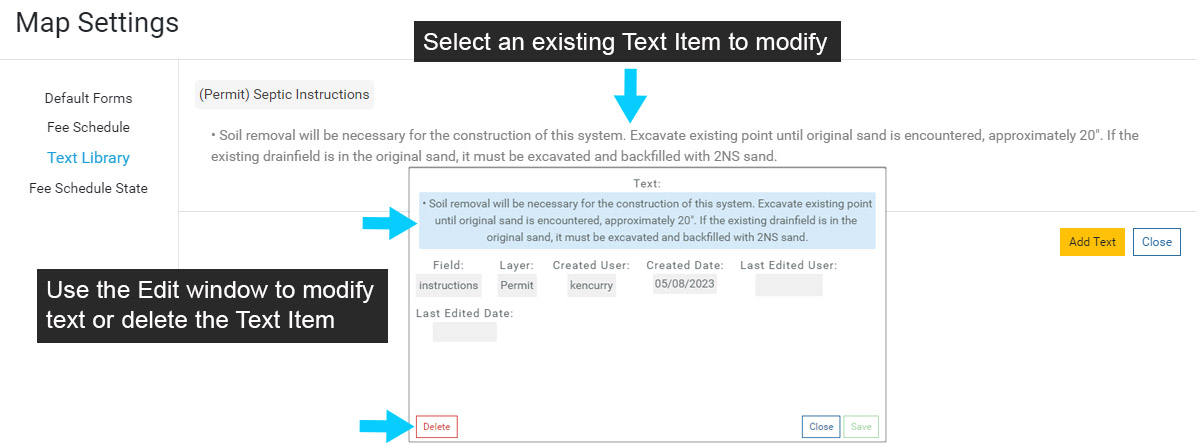
Select the gray header ((Permit) Septic Instructions) to view the Tables and Fields that are available in the Text Library.
Note that for Permit, you can organize Text Items for Septic and Well Permits, so Septic Instructions would be added to a Septic Permit, while Well Instructions would be added to a Well Permit.
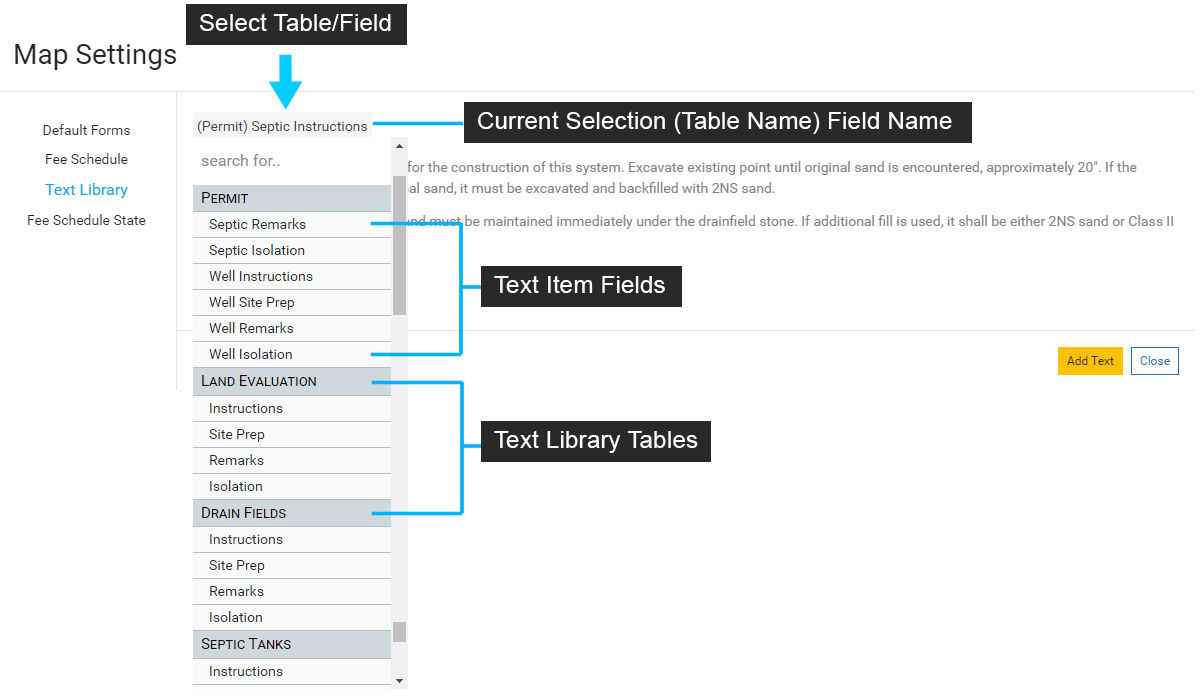
Select a Table and Field to add a new Text Item to the Text Library. In the example below the Permit table and Septic Instructions field are selected.
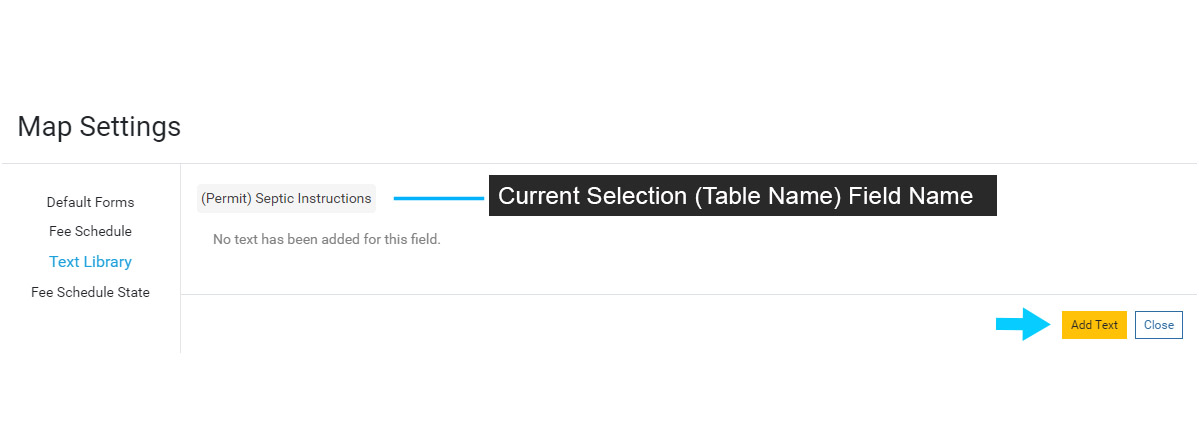
Initially, there will be no Text Items displayed as none have been added. Select ‘Add Text’ to add a new Text Item.
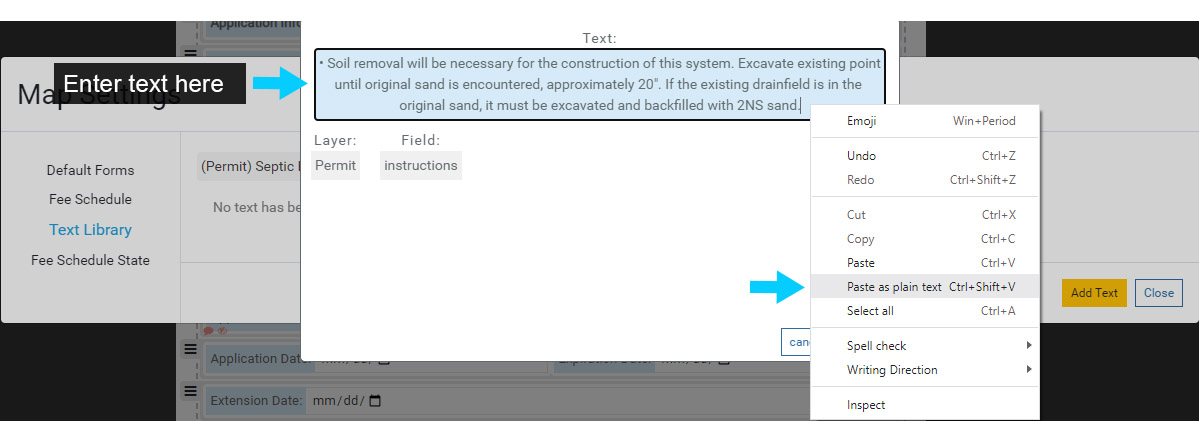
Use the menu to enter a new Text Item for the Permit Septic Instructions. The bullet will appear when the Text Item is added to a Permit, so if you do not want to use bullets, remove them before entering a Text Item.
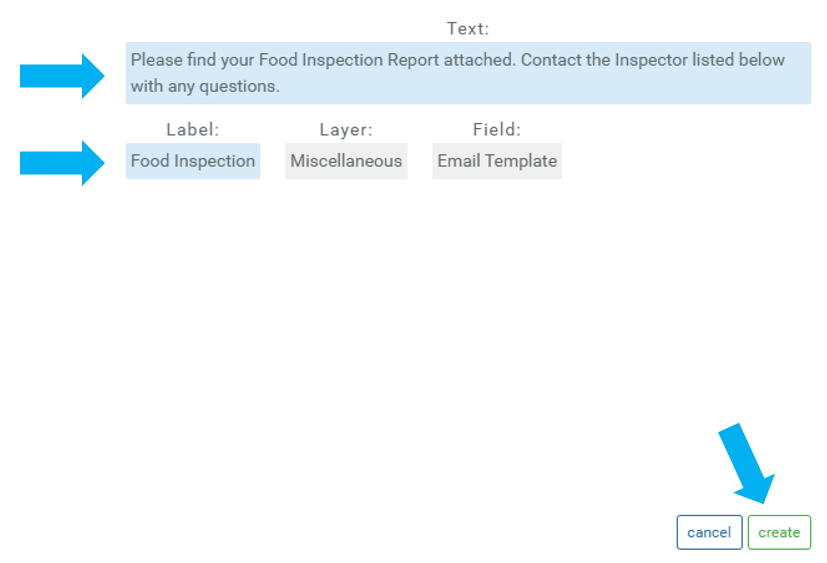
Labels are important to use as they will keep your lists from showing too much information and becoming hard to read.
You can also copy text in a document and paste into the Text field. When using this method, right click next to the bullet to open the context menu and select ‘Paste as plain text’.
Select ‘Create’ to add the new Text Item to the Text Library.
The new Text Item will now be displayed under the (Permit) Septic Instructions.
Select the Text Item to modify or delete it. Save any edits and close the Edit window when finished.
Add Text Item Fields to Forms #
In order to use the Text Library and corresponding Text Items, the corresponding Text Item Fields need to be added to the table’s Form (Permit, Land Evaluation, Drainfield, Septic Tank).
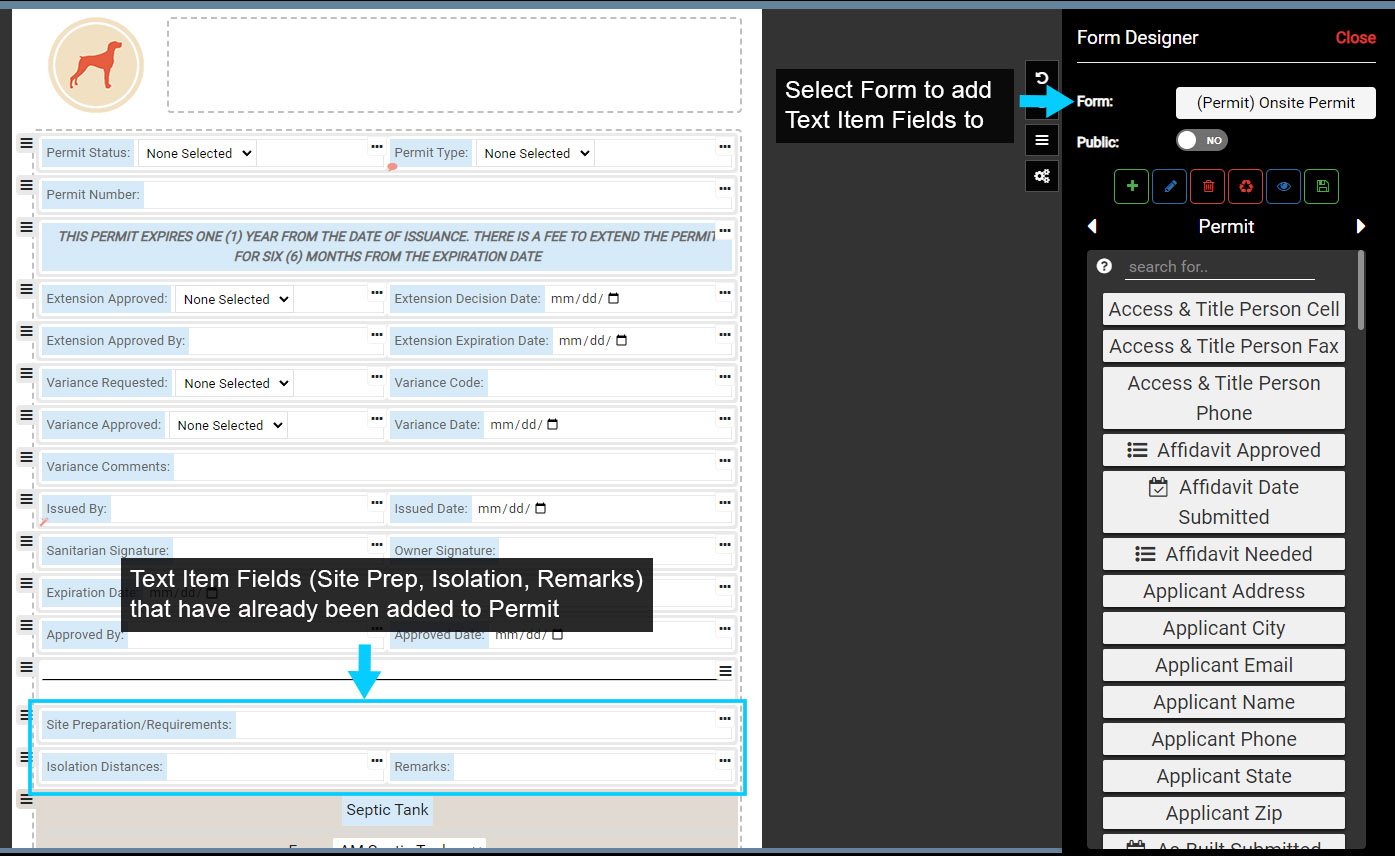
In Form Designer, select a Permit Form. In the image below the Onsite Permit Form has been selected and three of the four Text Items Fields (Site Prep, Isolation and Remarks) have already been added to the Permit.
Note that you can alias the Text Item Field names, so “Site Prep” in the image is now “Site Preparation/Requirements”.
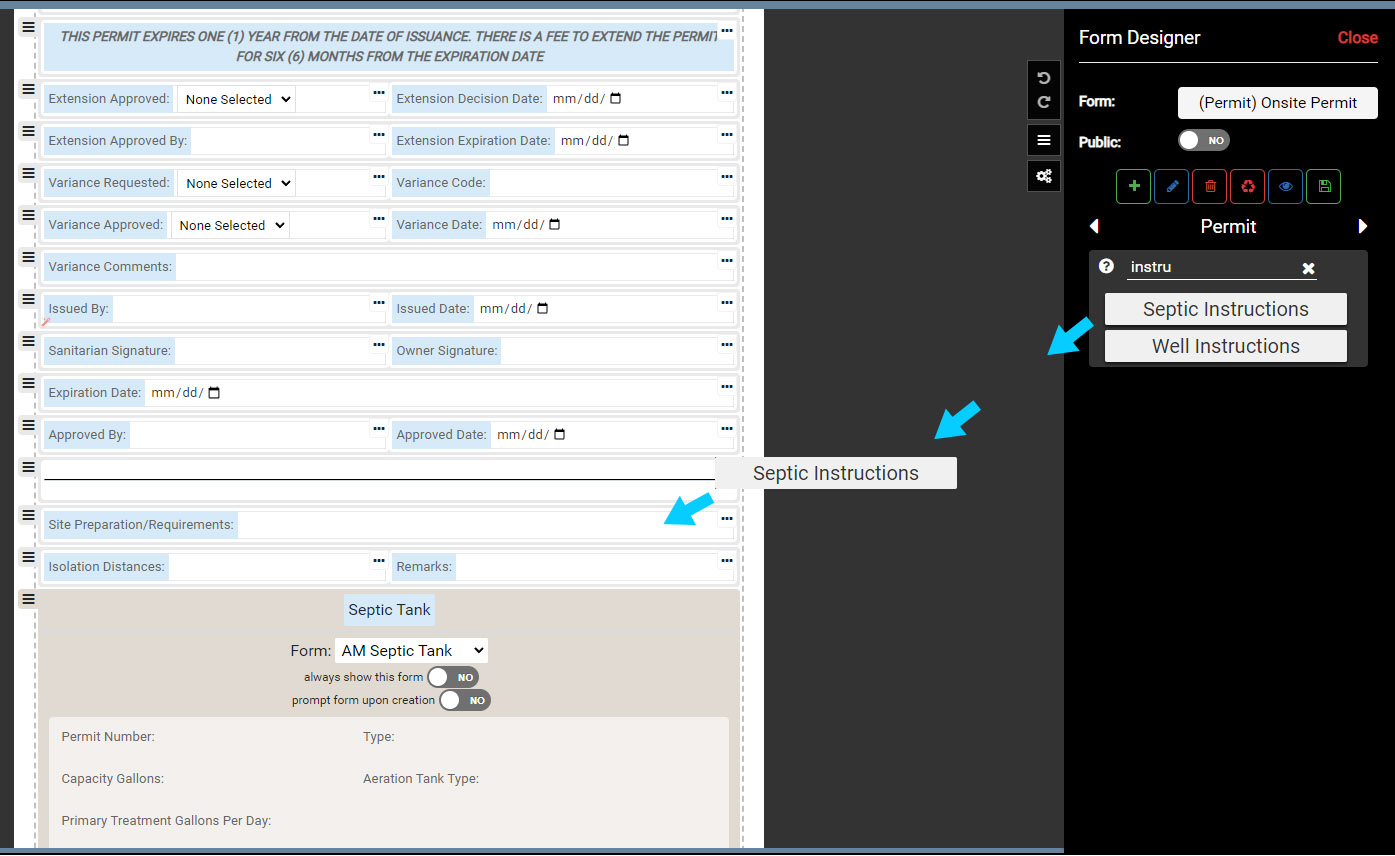
Locate the Instructions Field by scrolling the list of available Fields or typing “Instruction” in the search.
Because there can be a Septic or Well Permit, there are two Instruction Fields available.
Click and drag the Septic Instruction onto the Permit Form and Save the edits. The Text Item Field can now be used to add Instructions to a Permit.
Adding Text Items on Front End #
Once Text Items are added to the Text Library and the corresponding Text Item Fields have been added to the appropriate Forms, users can add Text Items to live Permits, Land Evaluations, Drainfields and Septic Tanks.
Select a System that has a Permit or other table (Land Evaluation, Drainfield, Septic Tank) with Text Item Fields added.
In the example below the System > Onsite Permit Form is selected.
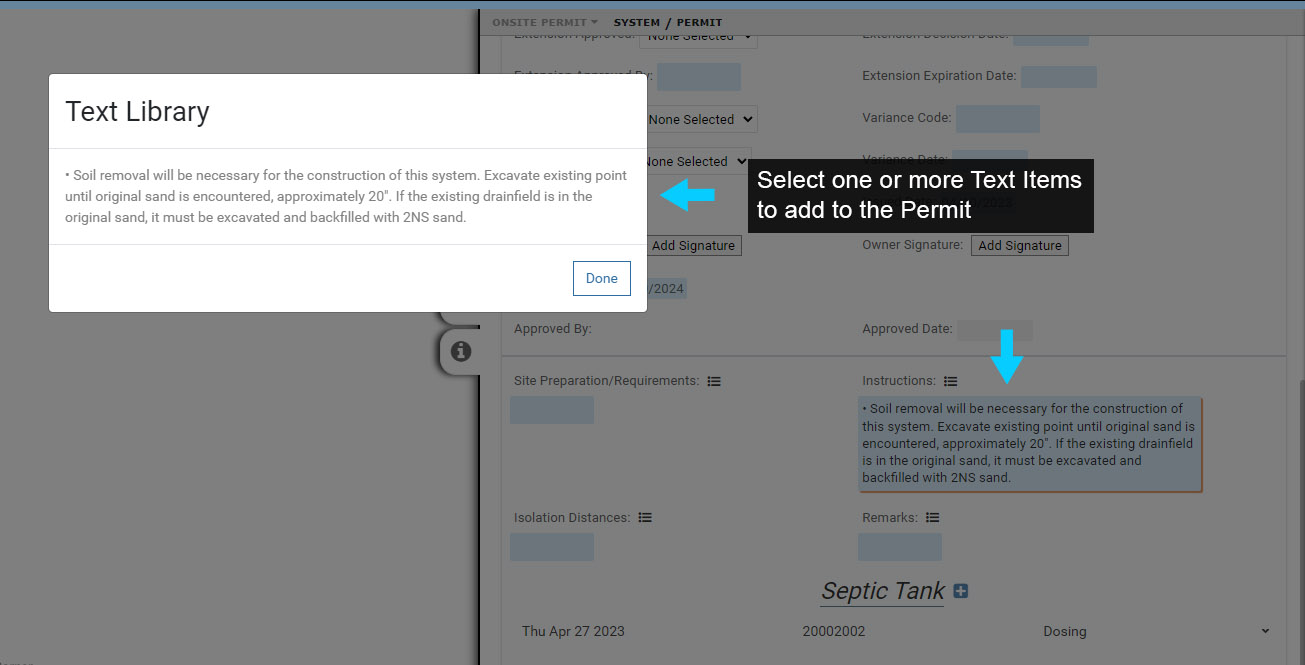
Use the “Import from text library” button to add Text Items to the Instructions.
Select one or more Text Items to add and note that the Text Items are added to the corresponding Field (Instructions in the image below). You can also add the same Text Item again and use for an additional text block if needed.
Select ‘Done’ to finish.
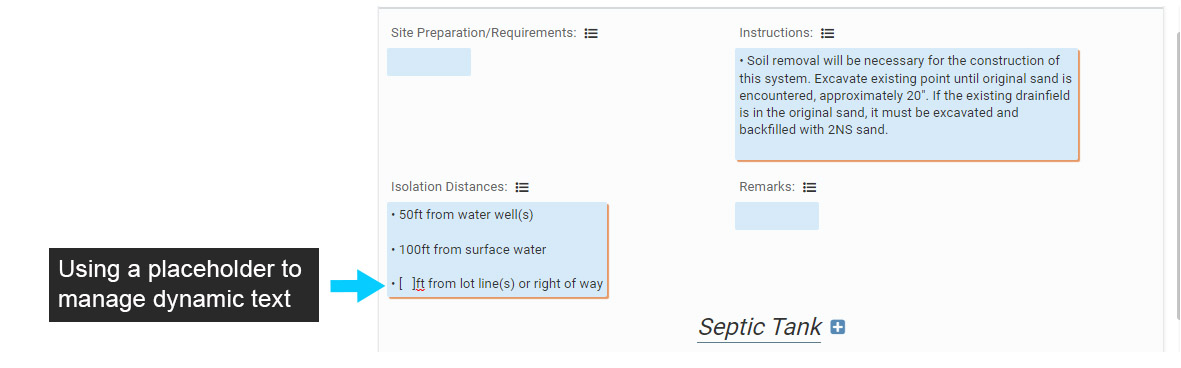
You can also create Text Items that act as placeholders for dynamic information, such as Isolation distances, depths and more.
In the example below a placeholder Text Item is used for different Isolation distances to lot lines or right of ways.
Contact Information & Email Templates #
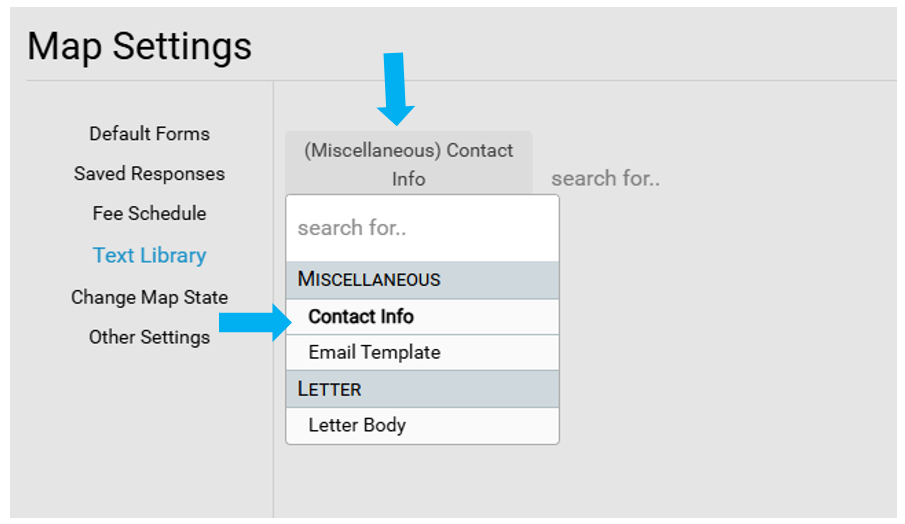
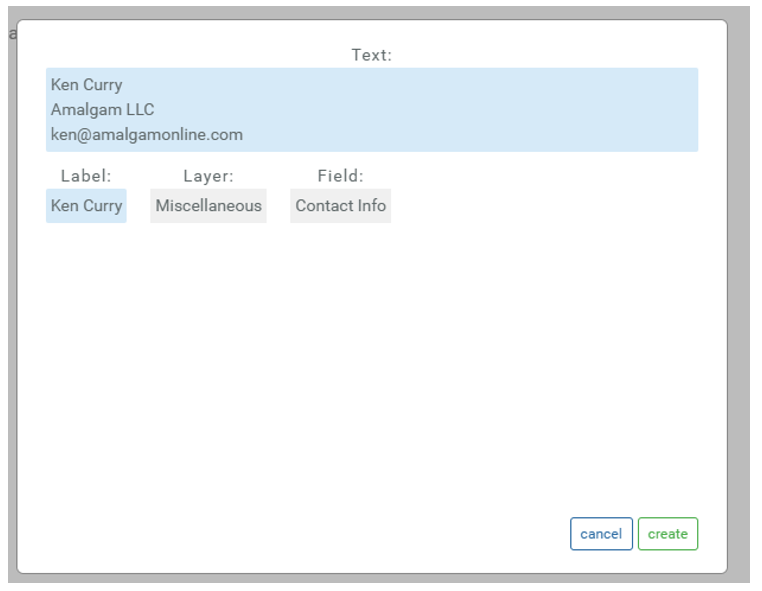
Contact information can be stored inside the text library to standardize and simplify adding to a record. They can be added to any Sanitarian Contact Info field that can be found in that map.
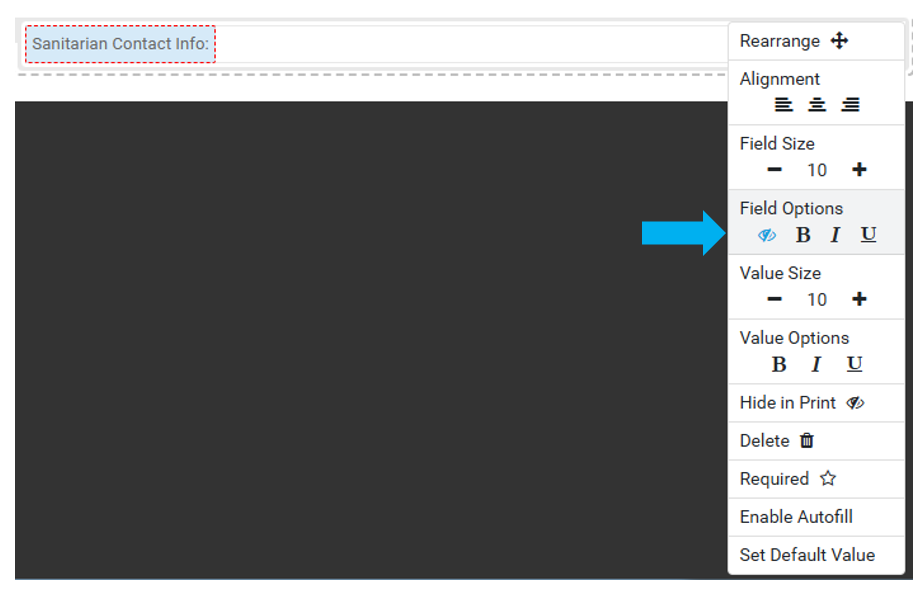
Note that you can use the Field Options – ‘Hide Field’ in Form Designer to hide the field name ‘Sanitarian Contact Info:’ during print.
A collection of common email templates can also be stored inside the Text Library.
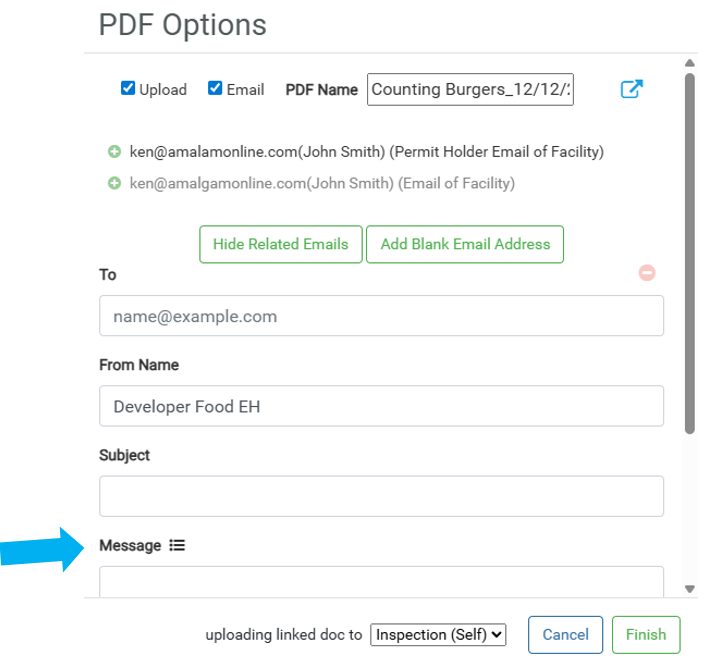
When composing an email in FetchEH, the Email Template items in the Text Library can be used to prefill the Message.