
Starting a Dashboard #
Select the Insights button from the main menu.

From the black pane that appears, click Dashboard,
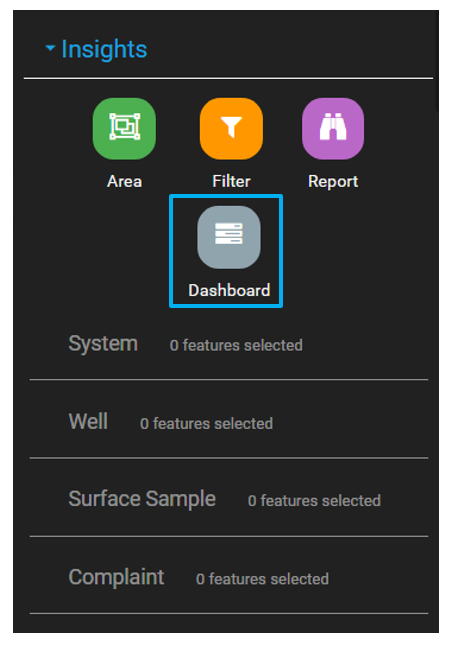
The user is then presented with the Dashboard area of FetchEH.
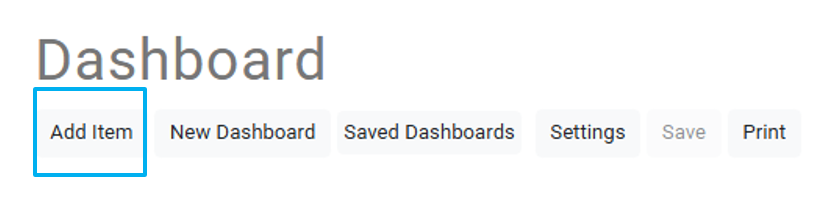
Populating a Dashboard #
Dashboards are comprised of one or more Items that area created by clicking Add Item.
Adding an Item includes creating a Filter, selecting a Statistic Field and a Statistic Type.
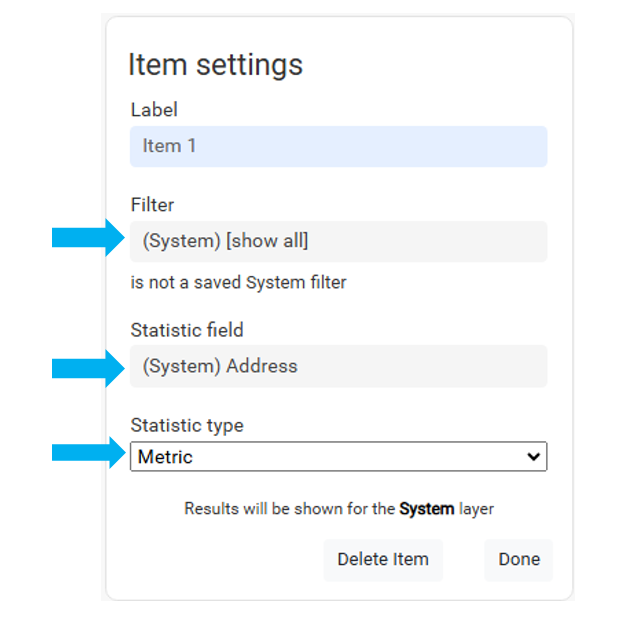
For assistance working with Filters, see this article.
Select the Statistic Field to choose the values that will be used to created the Dashboard visualization
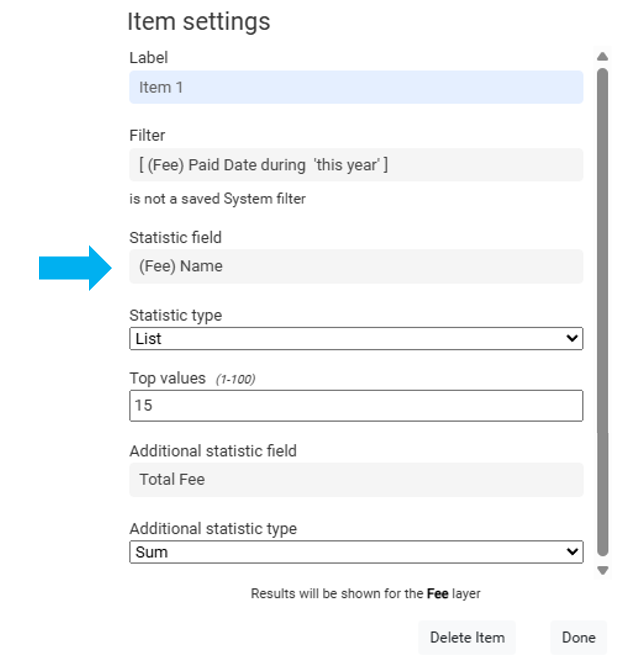
In this example it is the (Fee) Name.
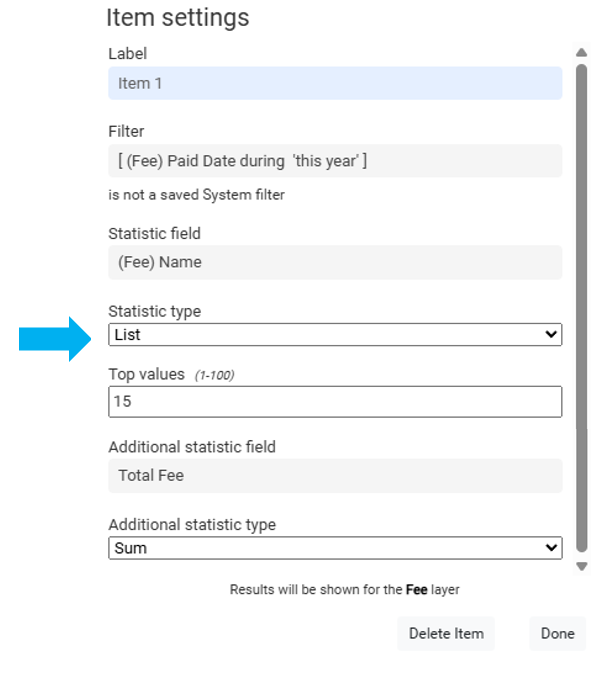
Select the Statistic Type to show how the attribute will be displayed.
In this example the List is used and provides two additional options.
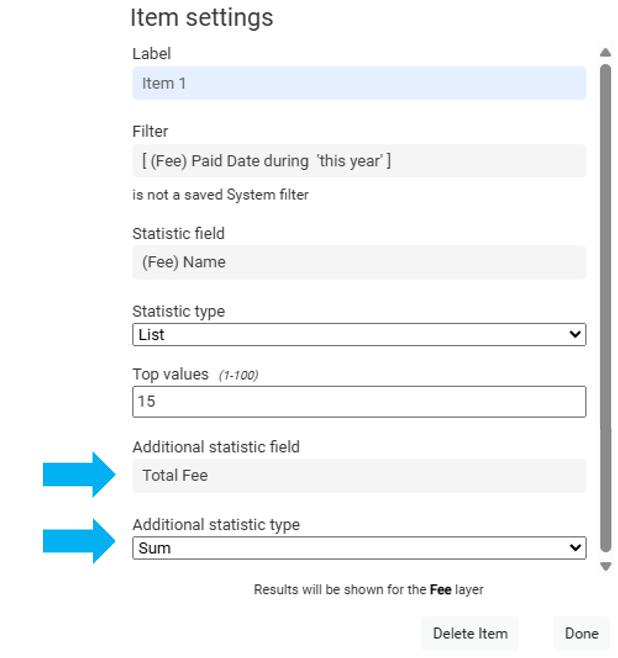
The Additional Statistic Field must be a numeric field and is used to add information to the visualization.
The Additional Statistic Type is the method in which the Additional Statistic Field is displayed.
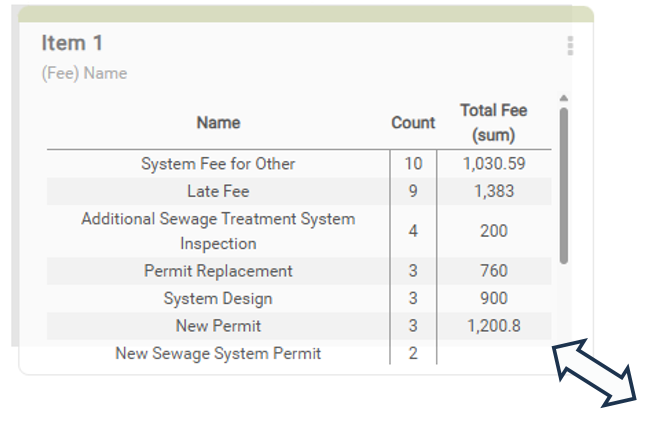
Click Done to add the Item to the Dashboard.
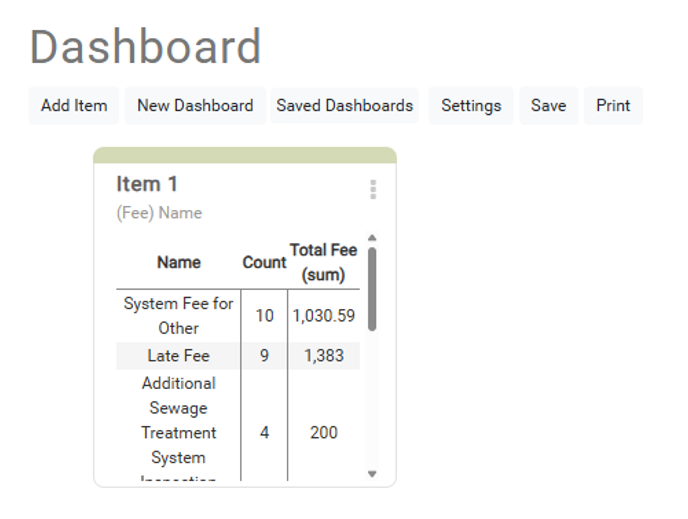
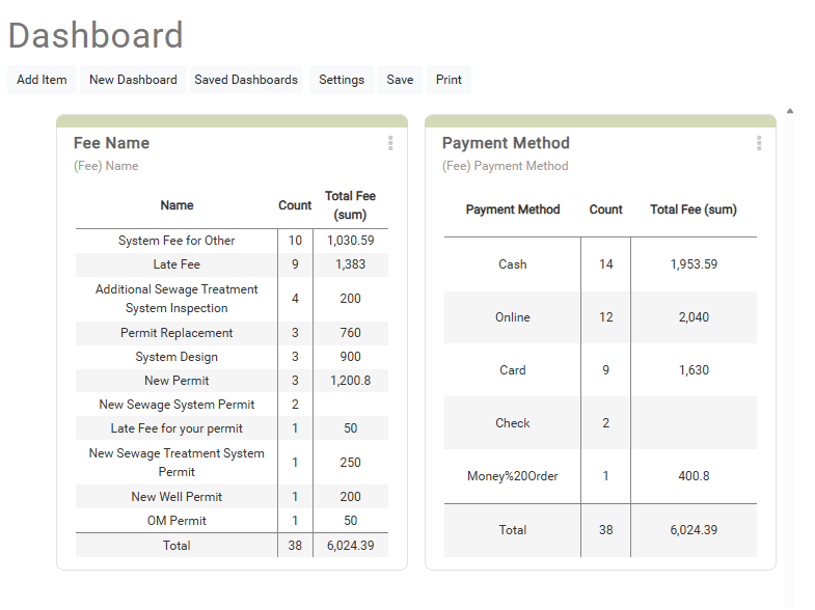
The finished Item will display a List of Fee Name that have been Paid This Year, along with the Total Fee.
Item containers can be resized by moving the cursor over a corner and dragging to the desired size/shape.
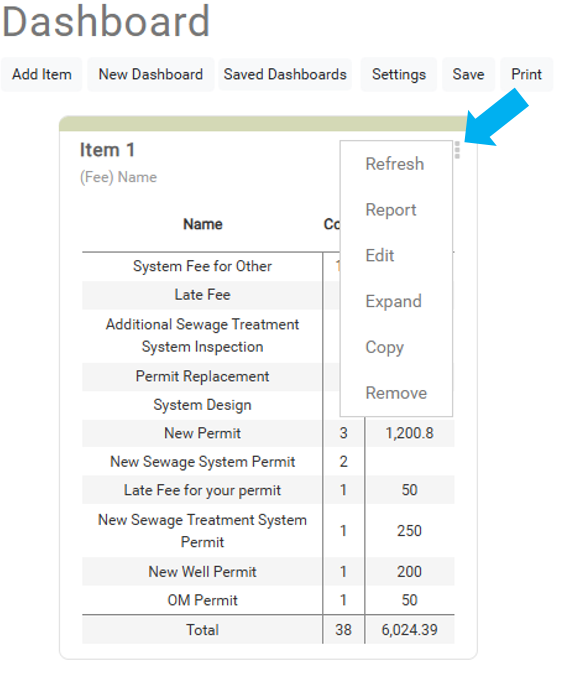
Select the three dots to open the Options menu.
Use Expand to display the Item in a larger context.
Use Copy to duplicate the Item.
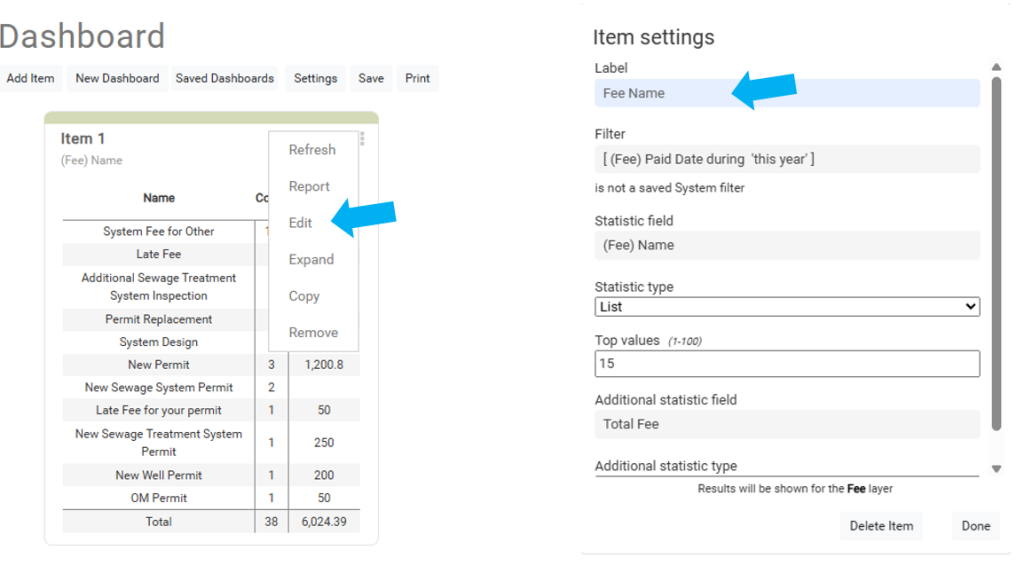
Use Edit to modify the Item.
Select Edit and change the Label for the Item in the Item Settings menu.
Select Copy and change the Label and Statistic Field then select Done.
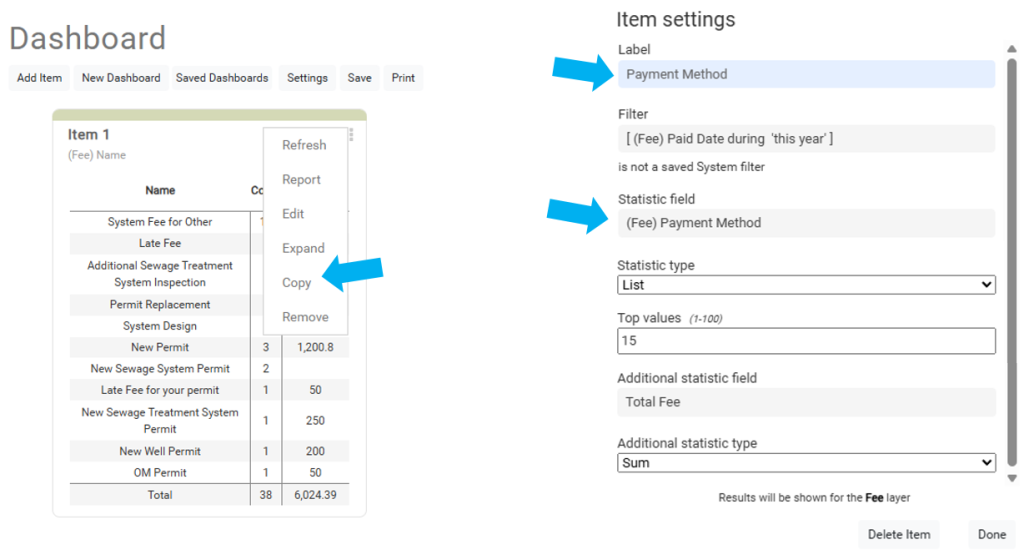
There will now be two Items in the Dashboard.
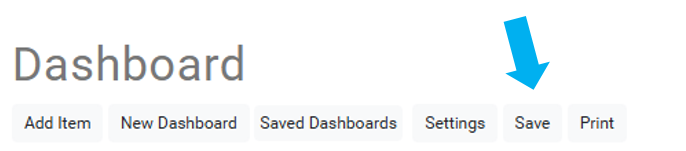
Click Save and name the Dashboard.
Settings allows management of the Dashboard.
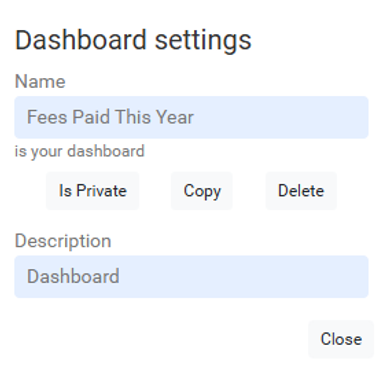
The Dashboard can be duplicated with the Copy button.
The Dashboard can be toggled be Private and Public. This refers to whether other users can view this Dashboard.
Dashboard can be temporarily modified, but those changes can only be saved by the person who created the Dashboard.
Creating a copy of a Dashboard gives a new user the ability to change and save the Dashboard to meet their specific needs.
Run a Report From a Dashboard Item #
Dashboard Items can also be used to Create Reports.
Select the Options button in the top right and then select Report.
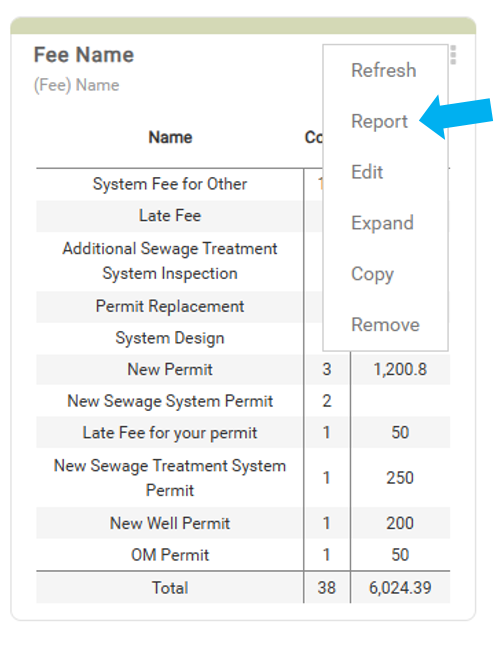
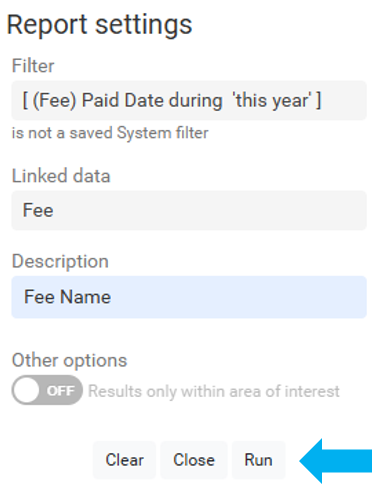
The specific Filter used in that Item will be carried over into a new Report.
Areas of Interest #
Areas of Interest can be used to narrow results to a particular area.
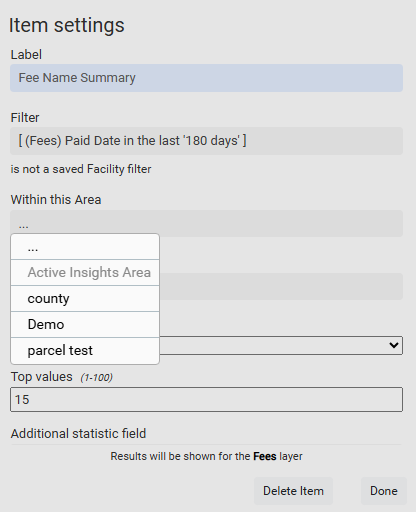
If an area is currently set for Visual Insights, the option Active Insights Area is allowed as an option.
The chosen Within the Area value will be saved with the Dashboard Item, except for Active Insights Area.
See this article for help with Areas of Interest.