Insights Filters
Apr 5th 2023
Insight Filters provide a way to segment information for a Report or Visualization. For example, a Report might include a Filter that finds all Restaurants that have an Inspection due in the next 60 days. Note that the Filter could also be applied to a Visualization to see the matching Restaurants on the map.
Applying a Filter to a Report or Visualization is similar to a query, where you ask a question and FetchEH provides results that match the Filter statement(s).
Creating a New Filter
This section will review creating and saving a Filter. Filters are created by building a statement(s) to segment information.
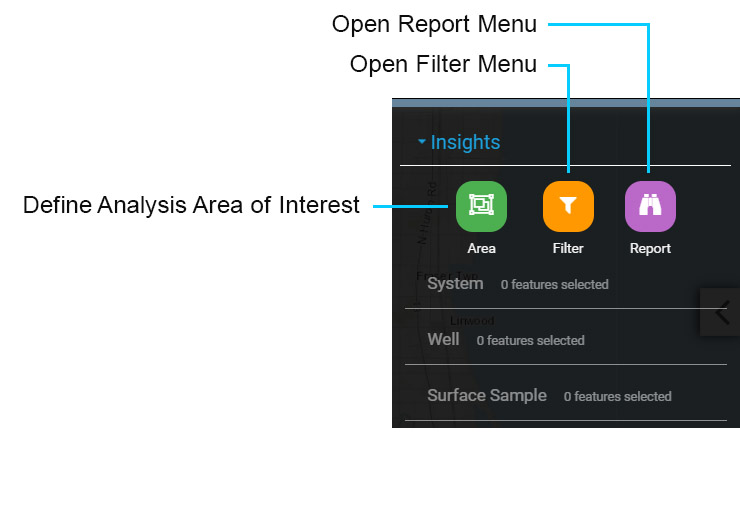
1. Use the Main Menu to select the Insights button.

2. Select the Filter option from the Insights menu to create a new Filter.
The Filter menu is used to select an existing Filter or to create a new Filter. Filters are constructed using at least one Statement, but may include many Query Statements organized into Groups. The Filter menu is described below:
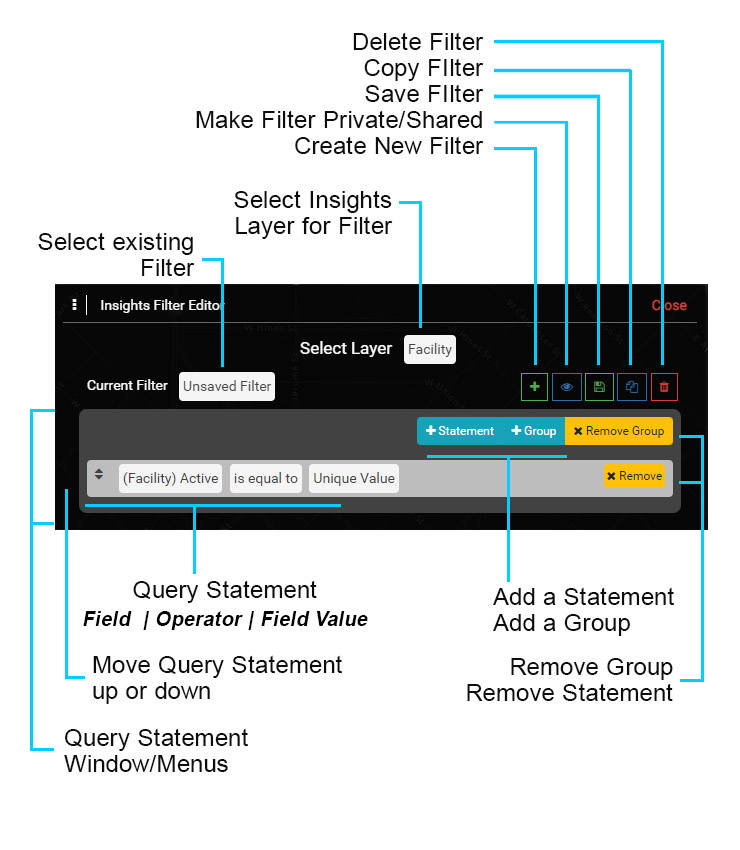
Select Insights Layer: before creating a new Filter, select the Layer that the Filter will be applied to. The Insights Layer are parent features, such as the System, Well and Facility. Note that the Fee and Complaint tables are also treated as parent features and can be selected for a Layer.
Current Filter: default setting is 'Unsaved Filter', which is used to create a new Filter. To select an existing Filter select the 'Unsaved Filter' text and a menu will appear.
Group Window: the dark gray window holds the Statement(s) that make up a Group. The options (+Statement, +Group, x Remove Group) are used to add new Statements to a Group, add a New Group and Remove a Group.
Statement: the light gray window is used to construct a Statement and includes selecting a Field - Operator - Field Value. Select the text in each cell to open the corresponding menu. The 'x Remove' button removes the corresponding Statement.
Delete Filter: used to delete the current Filter.
Copy Filter: used to copy an existing Filter and save it as a new Filter, where it can be modified. Note that any Shared Filter can be copied and Saved as a new Filter.
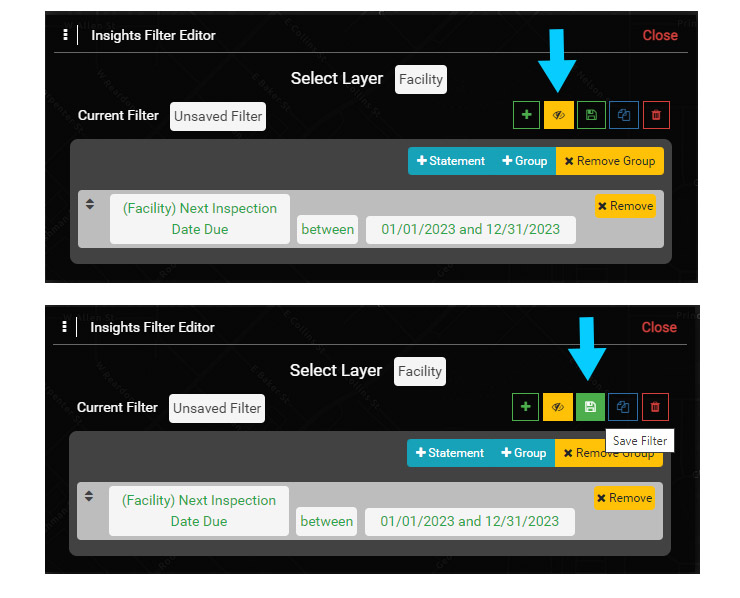
Save Filter: used to save a newly created Filter or an existing Filter that is modified.
Private/Shared Filter: set a Filter to be Private or Shared. A Private Filter can only be viewed and used by the Author of the Filter. A Shared Filter can be viewed and used by any user, but can only be edited by the Author. A Shared Filter can be copied by any user to replicate it or modify it in a new version.
Create Filter: used to create a new Filter when the Current Filter is set to an existing or saved Filter.
Note that any saved Filter can be used for Reports and/or Visualizations.
3. In the Statement area, select the Field (Facility) to add a Field to the Statement. Use the Search area to enter 'date' to help find Fields with the text 'date' in the name, then select Next Inspection Date Due. This will be the Field used for this Filter.
Note that Fields are organized under their corresponding Header, so all Facility Fields are under the Facility Header, and all Inspection Fields are under the Inspection Header.

4. Use the Operator menu to select different Operator options to see how they work, then select the Operator 'between'.
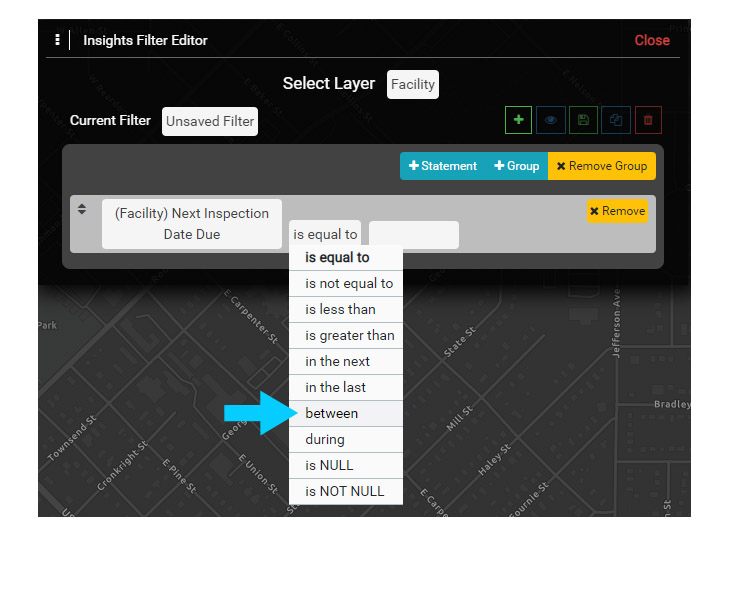
5. Use the Calendar to select a date range for your Filter. Using 'between' requires you to define a time range, which means that at some point the time range would need to be updated.
You could also use the Operator 'in the next' to define a dynamic time range, such as 'in the next' 60 days, which does would not need to be updated as it always looks forward 60 days.
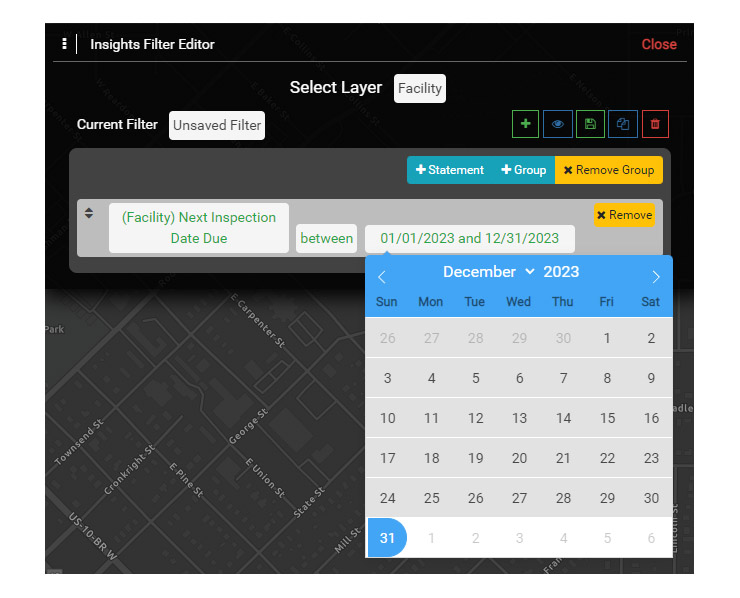
6. Set the Filter to be Private so only you can see it. Then Save the Filter and enter a name such as TEMP FILTER.
7. Create another Filter to look for Next Inspections and Follow Up Inspections Due in the next 60 Days. The result should look like the one below:
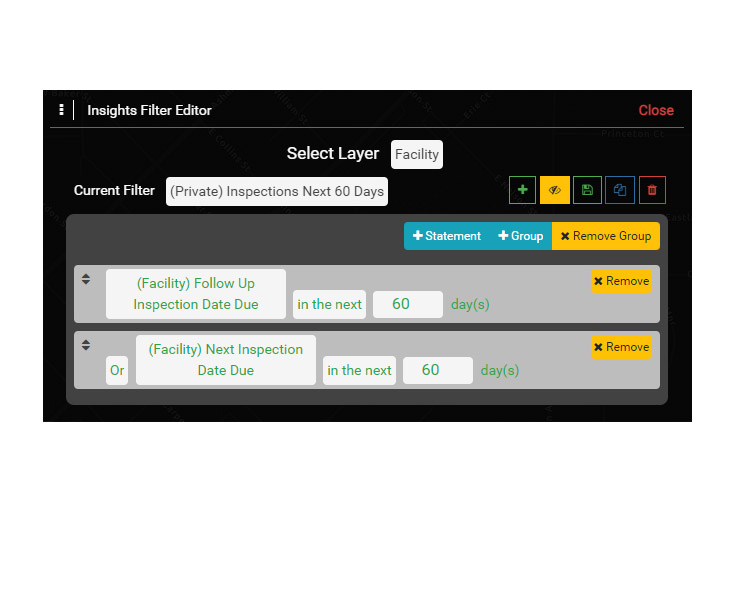
You have now created two Filters that can be used with a Report or a Map Visualization. In the next section, the Filter will be used to build a Report.