To view the Plants that have been added to an Itinerary, select the "Search" option from the Main Menu. Next, at the bottom of the Side Pane menu select "Itinerary" to view the Plants that have been added to the Itinerary.
To Zoom to a Plant in the Itinerary list, select the Plant Name from the list.
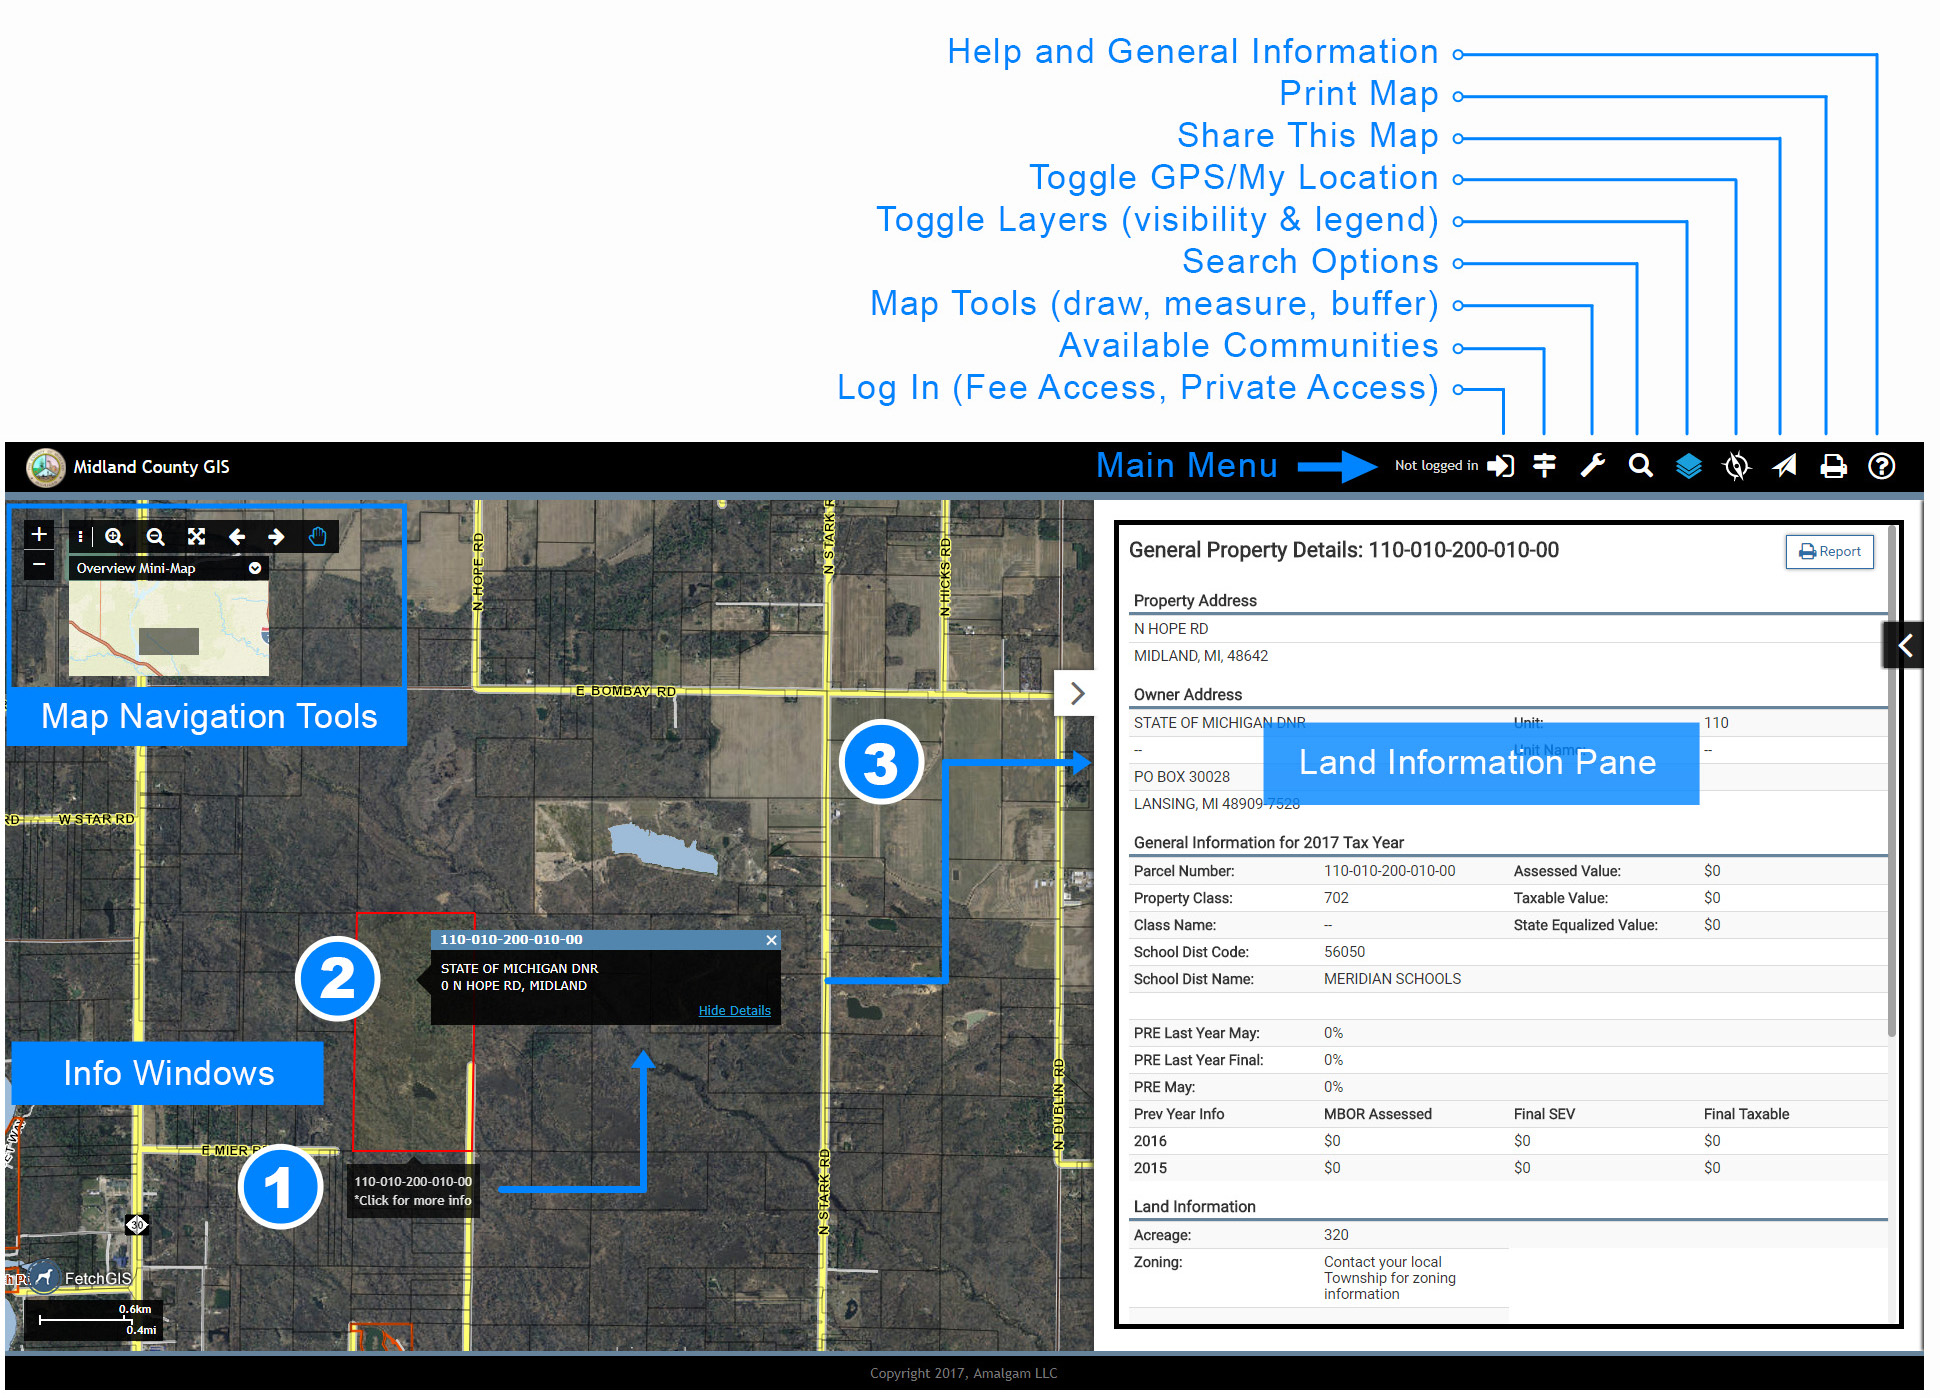
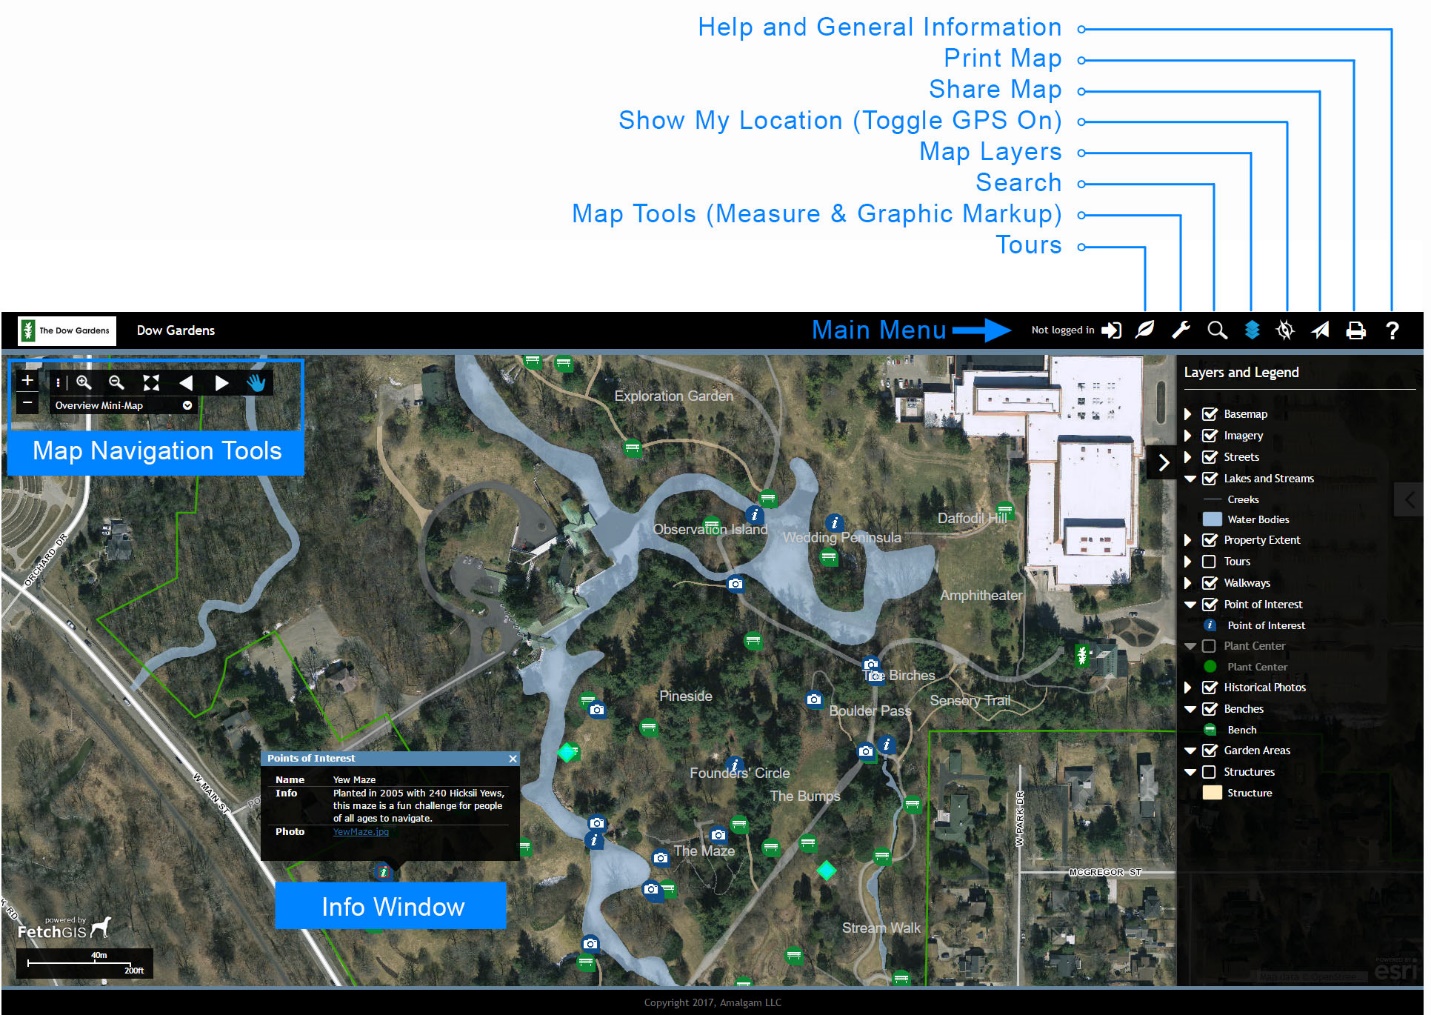
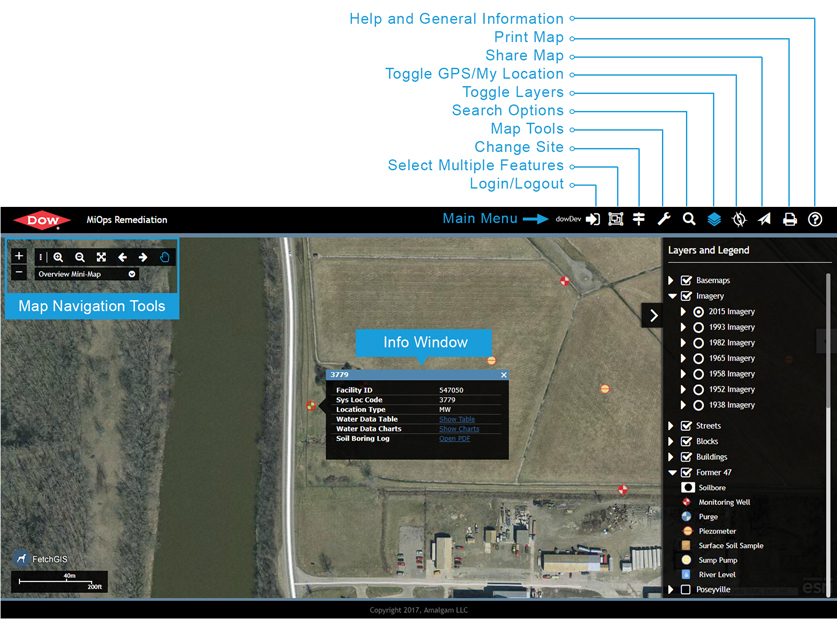
The Main Menu Bar provides access to a number of options including Map Tools, Search Options, Printing, Help and displaying a GPS location on the map. These options are described further below.
Log In - Used to access Private Access Services and Fee Access Services.
Log In - Used by Dow Gardens personnel to access private data and services.
Log In - Used to log in/out or go to Fetch Portal. *Note that Dow mapps require secure login before loading the main application, so users will not see a login prompt here.
Select Multiple Features - Used to select multiple Sample Locations at a time.
Available Communities - Used to change the current FetchGIS service to another community.
Change FetchGIS Site - Used to change the current FetchGIS service to another site.
Tours - Opens a menu used to select one of four Tours. Selecting a Tour will display the path and key plants of interest on the Tour
Map Tools - Provides access to a number of tools used to interact with the map display including Draw, Measure, Buffer and more.
Search - Provides options to Search for Plants and Benches. Results of a Search are displayed under the Search Results and listed by Name
Search - Provides options to Search for map features such as Locations (Monitoring Wells, Soil Bores, etc), Buildings, Parcels and more. Results of a Search are displayed under the Search Results and listed by Name
Toggle Layers - Displays the Layer Groups and Layers available in the current FetchGIS service. Provides a legend and visibility toggle for Layer Groups and Layers.
Toggle GPS - Displays the current location of a user on the map when GPS is enabled on their mobile device. Note, positional accuracy is determined by the mobile device and not FetchGIS.
Share This Map - Creates a tiny URL that can be shared with others. Shared maps preserve the current layers, graphic markup and map scale.
Print - Used to open the Printing Pane and create a custom map that can be printed or saved as a PDF.
Help - Used to access FetchGIS Help documentation and General Information.
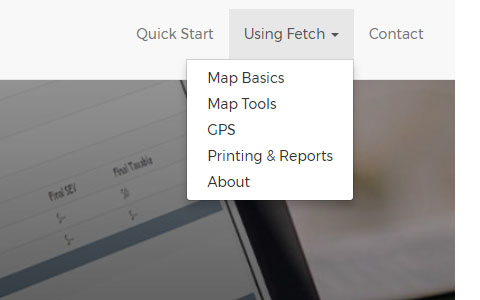 Help Menus